Essential Home Repairs: A Guide for Homeowners
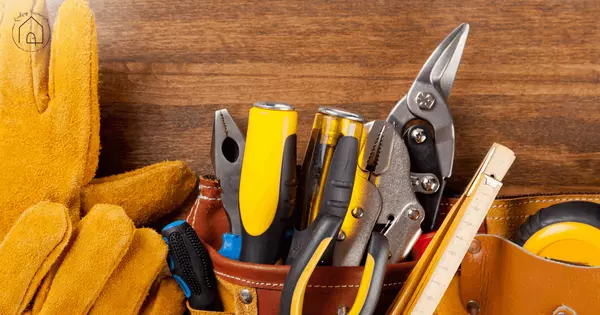
Keeping a home in good condition requires regular maintenance and occasional repairs. As a homeowner, understanding the essential home repairs can save you time, money, and potential headaches down the road. In this blog post, we will explore some common home repairs that every homeowner should be familiar with.
Plumbing Repairs: A leaky faucet, clogged drain, or running toilet are common plumbing issues that homeowners encounter. Knowing how to fix these minor plumbing problems can prevent water wastage and avoid costly repairs. We will discuss simple solutions and when to call a professional plumber.
Electrical Repairs: Faulty wiring or malfunctioning electrical fixtures can be dangerous and should be addressed promptly. We will provide guidance on basic electrical repairs, such as replacing a light switch or installing a ceiling fan. However, it's important to emphasize the importance of hiring a licensed electrician for complex electrical work.
Roof Repairs: A well-maintained roof is crucial for protecting your home from the elements. From replacing damaged shingles to fixing leaks, we will discuss some common roof repairs that homeowners may encounter. We will also highlight the importance of regular roof inspections to identify potential issues before they become major problems.
HVAC Repairs: A properly functioning heating, ventilation, and air conditioning (HVAC) system is essential for maintaining a comfortable indoor environment. We will provide tips on troubleshooting common HVAC problems, such as uneven cooling or heating issues. However, it's important to note that complex HVAC repairs should be left to certified technicians.
Structural Repairs: Over time, homes may experience structural issues, such as foundation cracks or sagging floors. We will discuss signs of potential structural problems and provide guidance on when to seek professional help. It's crucial to address these issues promptly to prevent further damage and ensure the safety of your home.
Bottom LineBy familiarizing yourself with essential home repairs, you can become a proactive homeowner and tackle minor issues before they escalate into major problems. Remember, while some repairs can be handled independently, it's important to recognize when it's time to call in a professional. Regular maintenance and prompt repairs will not only keep your home in good condition but also help preserve its value in the long run.
Choosing The Best Bathroom Tile
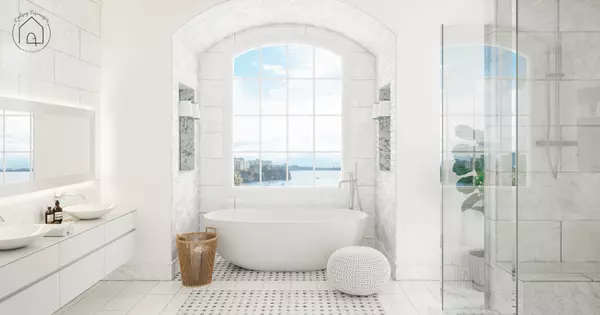
If it is time for your bathroom to get a renovation, you are likely already thinking of what style you have in mind for the update. One of the major parts of that design is your tile. Here is a quick guide to choosing the best tile!
1. Pick Out Your Favorite First.
When looking at tile options, you will likely find one that you immediately fall in love with. If you find yourself picturing the rest of your bathroom based off a tile, choose that tile and use it as your starting point.
2. Keep It Simple.
Depending on your bathroom, you might have floor tile, wall/accent tile, and bath tile. Try to use no more than 3 different types of tile, and do your best to keep it to 2. You will have trouble matching tiles the more you choose and tiles that differ too much in a small space can make it feel cluttered. If you ever plan to resell your home, choosing too many tile options or choosing extremely decorative tile can date your bathroom quickly and might end up costing you during the selling process.
3. Consider Maintenance.
Have you ever had a bathroom where it felt impossible to clean certain parts? Keep that in mind when choosing your tile. Consider the amount of maintenance it will require. If you prefer little to no maintenance, choose either a porcelain or ceramic option. If upkeep isn’t a big deal to you, natural stone is an option for you as well.
4. Choose!
The hardest part is choosing. Instead of doubting yourself, take that tile you first fell in love with a see if you can imagine a bathroom styled around that tile. If you can, go for it!
Upgrade Your Dining Room Decor with Simple Elegance
For many of us, the hustle and bustle of day-to-day life means our houses see more chaos and traffic than a rush-hour train station. The idea of an oft-used space like the dining room looking buttoned-up with sophisticated decor is almost laughable.
But lately we’ve noticed a return to formality: More homebuyers are seeking out properties with a formal dining room, and current homeowners are warming to the idea of bringing more refined furnishings into their dining area. Some experts chalk it up to a stark reaction to the years we spent being casual and cozy indoors during the COVID-19 pandemic.
So with the spring season right around the corner, now is a great time to focus on adding a bit of elegance to your dining room decor. To inspire your aesthetic overhaul, here are five trending looks:
1. Mauve velvet chairsJewel-tone velvet dining chairs have had a hold on the design world for a while now. The trend toward using velvet dining chairs in shades like mauve is driven by a desire for warmth, coziness, and a touch of glamor. These chairs pair well with a variety of dining tables, from traditional to modern, and work particularly well with brass or gold accents. They also bring sophistication, elegance, and depth to the overall design of the room.Get the look: Smarten up your dining room with a few mauve side chairs.
2. Chinoiserie wall artCreate an elegant focal point in your dining room by adding some Chinoiserie-style wall art. The trend toward using Chinoiserie wall art is driven by a desire to bring a touch of Eastern-inspired beauty and elegance to the home. These pieces pair well with a variety of decor styles, from classic to contemporary, and work particularly well with light-colored walls. The intricate and colorful designs are inspired by traditional Chinese motifs and provide a timeless and classic style.Get the look: Create a classic vibe in your space with framed prints.
3. Grass-cloth wallpaperThe dining room is a popular place for homeowners to experiment with wallpaper. And the grass-cloth wallpaper adds visual interest and sophistication to an otherwise dull space. Made from plants dried in the sun, grass-cloth wallpaper surrounds your room in warmth and texture. Its popularity is easy to trace since the biophilic design trend has been going strong for a few years with homeowners seeking out additional ways to bring the outside in. You can achieve the same look for less with a printed wallpaper in a grass-cloth pattern.Get the look: Embrace the great outdoors this spring with faux grass-cloth wallpaper.
4. Large stone vaseIf your dining room is lacking a central statement piece, seek out a stone vase. An oversized textured stone vase works well to create balance with another textured object in the room like a light fixture, furniture, or big spring flowers. It’s a natural look that feels right in a room with other earthy materials like linen, rattan, or even a beige area rug.Get the look: Balance out your springtime bouquet with a handcrafted terra-cotta vase.
5. Blown-glass pendantsAn elegant dining room doesn’t have to be stuffy! Get creative and add an artistic oomph above your dining table with blown-glass pendants. Blown-glass pendant lights are a functional way to bring an artistic element into your home. A homeowner with an eclectic style will be drawn to the opportunity to hang vivid colors and shapes over their dining room table.Get the look: Find the perfect expression of your artistic vision by shopping collections of blown-glass pendants on Etsy.
Storage Ideas For Small Bathrooms
Is your bathroom small? That is the worst, isn’t it? Unfortunately, small bathrooms are very common and are usually the smallest rooms in the house. I would bet that it almost always feels cramped and tight in there. If you can’t change the square footage, a change of organization and storage space can make a drastic change to how your bathroom feels.
Here are a few tips and tricks to make your bathroom space feel more functional and spacious.
Medicine CabinetIf you have a regular mirror, replace it with one that includes a medicine cabinet and provides further storage space.
ShelvingIf you have free space above your toilet, vanity, or other another empty part of the wall, install shelving units. Purchase a few decorative baskets to maximize shelf space.
HooksWith a few decorative hooks, in a style of your preference, you can declutter by placing a few hooks on the back of the door to hang towels or robes. Consider placing one or two right next to each end of the shelving unit you just installed to add even more organizational space!
Towel RacksA rack installed inside of your shower can save you space and convenience. If there is one already, adding an additional shower bar above the original will work nicely. Another idea is installing a few racks a couple of feet above each other or right next to one another. If you have an excessive amount of towels, store some of them away in a bedroom closet.
Vanity with CabinetI have come across plenty of pedestal sinks in small bathrooms, but if you want save some space, add some storage, and upgrade the look of your bathroom at the same time, a vanity cabinet will definitely do the trick.
What To Pack For The First Night In Your New Home
You just finished unloading the final box from the moving truck, and now you’re officially moved in to your new home! You go to take a shower to wash off the day, only to realize you don’t have a shower curtain. After spending a full day moving into a new home, the last thing you are going to want to do is dig through all of your unopened boxes to find an outfit or a charger (or even a shower curtain). The next time you’re moving, create a ‘first night box’ so that your essentials aren’t hidden at the bottom of another box.
Here is a list of what you should pack:
1. Toiletries
You may have thought about keeping your tooth brush in an easy-to-find place when packing, but you’ll need more toiletry essentials to get through the first night or two. Be sure to pack toilet paper, towels, a shower curtain + rod, shower items, and a first aid kit.
2. Clothes
Unless you are an extremely organized packer, finding an outfit for the next few days isn’t going to be easy if you have to dig through multiple boxes. Pack 2-3 days worth of clothes and pajamas.
3. Electronics
Don't forget your chargers. Make sure you've got your phone, laptop, and any other charger you may need for your devices during the first few days at home. Pack any necessary cords and cables needed if you plan to unbox your television the first night Be sure to pack a flashlight as well just in case!
4. Air Mattress/Bedding
If your bed hasn't made it to your new room yet, you will want to make sure you have an air mattress in your first night box. Check to ensure the air pump is packed as well! If your furniture is unloaded, you will sleep better if the bedding you love is easily accessible on that first night in your new home.
5. Eating Utensils & Kitchen Items
Avoid the mess of dirty dishes your first night home and pack disposable eating utensils. You may also want to pack wipes to quickly clean up any messes made at mealtime and a garbage bag to be able to dispose of any waste quickly. Cleaning supplies typically aren't the first thing on our minds when moving into a new home, so be sure to pack these items so that you aren't scrambling to the store after a long day when you're ready to clean up after a meal.
Adjusting and Making the Most of Your New Home
The journey of homeownership is an exciting and fulfilling one, but it also comes with its fair share of adjustments. Whether you've just purchased your dream house or moved into a new rental, settling into a new space requires some adaptation. We'll explore practical tips and advice to help you adjust and make the most of your new home, turning it into a comfortable haven that truly reflects your personal style and needs.
Embrace the Space
One of the first steps to feeling at home in your new abode is embracing the space and making it your own. Take some time to visualize how you want each room to look and function. Consider the layout, natural light, and existing features when planning your furniture arrangement. Experiment with different configurations until you find the perfect balance between aesthetics and functionality.
Unpack and Organize
The process of unpacking can be overwhelming, but tackling it systematically will help you settle in faster. Start with the essentials, such as kitchen and bathroom supplies, bedding, and clothing. As you unpack, make it a point to declutter and organize your belongings. Donate or discard items you no longer need, and find practical storage solutions to keep your space neat and clutter-free.
Personalize Your Space
Turning your new house into a home involves infusing your personality and style into every corner. Personalize your space by hanging artwork, displaying cherished photographs, or incorporating meaningful decorations. Introduce colors, textures, and patterns that resonate with you to create a warm and inviting atmosphere. Remember, it's the small touches that make a house feel like a home.
Prioritize Comfort
Your home should be a sanctuary where you can relax and unwind. Pay attention to the comfort aspects of your living space. Invest in quality mattresses, cozy bedding, and comfortable seating options. Enhance the ambiance by adding soft lighting, plush rugs, and curtains or blinds that offer both privacy and natural light control. By prioritizing comfort, you'll create a space that nurtures your well-being.
Get to Know Your Neighborhood
Adjusting to a new home involves familiarizing yourself with the surrounding area. Take some time to explore your neighborhood, discover local amenities, and connect with the community. Visit nearby parks, cafes, restaurants, and shops. Join local social groups or participate in community events to meet new people and forge meaningful connections.
Home Maintenance and Upkeep
To truly make the most of your new home, regular maintenance is key. Create a maintenance schedule to keep your property in top condition. Attend to repairs promptly, maintain cleanliness, and consider routine inspections of your electrical systems, plumbing, and HVAC equipment. By staying on top of home maintenance, you'll preserve its value and ensure a comfortable living environment.
Scent-sational Secrets For Your Home
Have you ever walked into someone else’s home and were overwhelmed by how incredible it smelled? Or maybe you couldn’t wait to leave because there was a not-so-great scent as soon as you entered? Often, we become so accustomed to the way our own home smells that we don’t notice if the scent is bad or good. It can be frustrating to wonder what others think about the scent of your home.
If you feel like your house doesn’t always smell fresh, follow these steps to make sure that it smells amazing all the time.
ELIMINATE BAD SMELLS
Empty garbage cans regularly
Clean out your refrigerator once a week
Sprinkle baking soda or carpet deodorizer before vacuuming
Open the windows when the weather is nice
Invest in an air purifier
If you have pets, brush and bathe them often
Get rid of old musty towels
Use a daily bathroom cleaner spray to prevent mildew smells
Pour a little drain cleaner in your sinks on a weekly basis to get rid of any unwanted scents
ADD NEW SCENTS
Add a few drops of essential oils on your air filters
Use linen spray daily
Burn candles
Use a wax melter
Arm up homemade potpourri in your crockpot
Place car vent clips in your air conditioner vents
Buy fresh plants for your home
Invest in good-smelling cleaning products with scents you love
Use an essential oil diffuser
Unleashing Creativity in Your Living Space
Your home should reflect your unique style and personality, and we're here to share creative tips and tricks to help you achieve just that. From innovative decor ideas to practical organization hacks, let's embark on a journey of turning your house into a true haven.
Expressive Interiors: Infuse Your Space with Personality
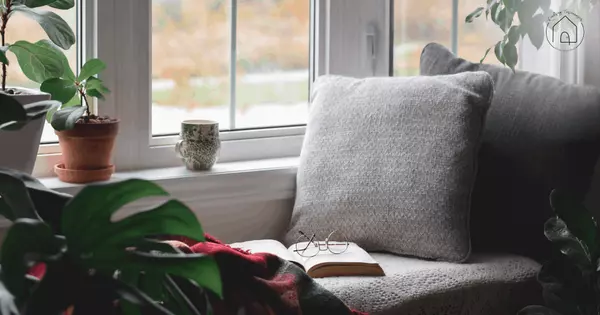
Your home is a canvas waiting to be painted with your individuality. We'll explore ways to incorporate your passions, hobbies, and memories into your interiors. From displaying your art collection to creating a cozy reading nook, we'll guide you on how to design spaces that speak to your soul.
Green Thumb Magic: Embrace Indoor Gardening
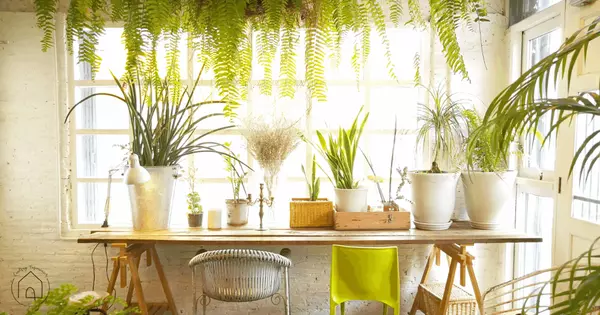
Bring the outdoors inside and breathe life into your home through the wonders of indoor gardening. Discover the benefits of plants, from purifying the air to boosting your mood. Learn about low-maintenance plants, vertical gardens, and creative ways to display your botanical treasures.
Repurposing Delight: Give New Life to Old Objects
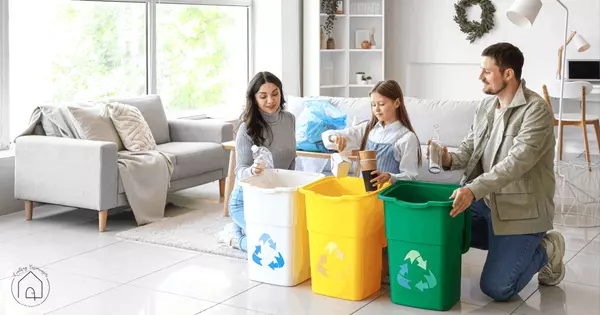
One person's trash can be another person's treasure. We'll share innovative ways to repurpose and upcycle everyday items, reducing waste and adding character to your home. Discover how to turn mason jars into beautiful candle holders, transform vintage suitcases into unique coffee tables, or create whimsical planters from recycled materials.
The Art of Simplicity: Minimalism and Decluttering
In a world filled with excess, finding peace through minimalism becomes essential. Explore the benefits of decluttering and discover practical strategies to simplify your living space. From clever storage solutions to minimalist decor, we'll guide you on your journey to a clutter-free and serene home.
Tech-Savvy Innovations: Smart Home Upgrades
Welcome to the future of home living! Explore the latest tech-savvy innovations that can enhance your daily life. Discover smart lighting systems, voice-activated assistants, automated window blinds, and energy-saving gadgets that will elevate your home's functionality while adding a touch of modernity.
Seasonal Delights: Decorate with Festive Flair
Celebrate each season with delightful decor that reflects the spirit of the time. From cozy autumnal accents to festive holiday adornments, we'll provide creative ideas to make your home come alive throughout the year. Discover DIY wreaths, handmade ornaments, and imaginative centerpieces that will leave your guests in awe.
Zen Spaces: Creating Tranquil Retreats
In our busy lives, finding solace and tranquility within our own homes is crucial. Learn how to create Zen spaces where you can unwind and find inner peace. Explore the world of meditation corners, soothing color palettes
Pet-Friendly Home Design
Welcome to Pawsitively Perfect, where we believe that a well-designed home can be both stylish and pet-friendly. We will explore creative and practical tips to help you design a home that is not only visually appealing but also enhances the happiness and well-being of your pets.
Choose Durable and Easy-to-Clean Materials
When it comes to pet-friendly home design, selecting the right materials is key. Opt for flooring that can withstand scratches and accidents, such as hardwood with a strong protective finish or luxury vinyl flooring. Consider stain-resistant and washable fabrics for upholstery and drapes, and opt for easily washable slipcovers to protect your furniture from pet hair and dirt.
Create a Pet-Friendly Zone
Designate a specific area in your home that is dedicated to your pets. This could be a cozy corner in the living room or a small nook in the hallway. Set up a comfortable pet bed, provide access to toys, and ensure a nearby supply of fresh water. By creating a designated space for your furry friend, they will feel secure and have their own special spot within your home.
Incorporate Pet-Friendly Furniture
Gone are the days of unsightly pet accessories. Nowadays, there is a wide range of stylish and functional pet-friendly furniture available. Look for furniture pieces that integrate pet beds or feeding stations seamlessly. From stylish cat shelves to doggy drawers, these pieces will blend seamlessly into your home's overall design while providing comfort and convenience for your pets.
Conceal the Litter Box
If you have a feline friend, finding an elegant solution for the litter box is essential. Consider using litter box furniture, which cleverly disguises the litter box within an attractive piece of furniture, such as a bench or cabinet. This way, your cat can have their privacy, and you can maintain the aesthetic appeal of your space.
Optimize Natural Light and Outdoor Access
Pets, especially dogs, thrive when they have access to natural light and outdoor spaces. Design your home to maximize natural light by using window treatments that allow sunlight to filter in. Create a pet-friendly backyard or balcony area, if possible, where your furry companion can enjoy fresh air and playtime. Incorporate pet doors or consider building a small pet-friendly ramp or staircase for easy access to the outdoors.
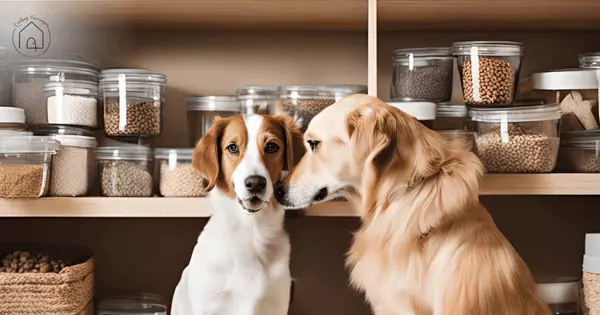
Storage Solutions for Pet Supplies
Keeping your pet's belongings organized is crucial for maintaining a clutter-free home. Incorporate storage solutions specifically designed for pet supplies, such as built-in cabinets or shelves. Dedicate a specific area to store food, toys, leashes, and grooming essentials, ensuring everything is easily accessible yet neatly tucked away.
The Art of Captivating Listing Photos
In today's digital age, potential buyers often form their first impressions based on online images, making high-quality listing photos an essential marketing tool for selling your home. Join us as we explore valuable tips and tricks to help you showcase your property in its best light and attract eager buyers.
Create a De-Cluttered and Clean Environment
Before the photo shoot, it's crucial to declutter and clean your home thoroughly. Start by removing personal items such as family photos, excessive decorations, and memorabilia. Clear countertops, shelves, and tabletops to create a clean and spacious look. Remember, less is more when it comes to staging your home for listing photos.
Stage for Success
Staging your home plays a vital role in enticing potential buyers. Arrange furniture to maximize space and create inviting focal points. Consider using neutral-colored furniture and accessories to appeal to a wider range of tastes. Pay attention to details like pillows, throws, and fresh flowers, as they can add warmth and visual appeal to your photos.
Maximize Natural Light
Natural light can transform any space, making it feel bright, airy, and welcoming. Open up curtains and blinds to allow as much natural light as possible into your home. If you have dark or poorly lit areas, consider adding additional lighting fixtures or strategically placing lamps to brighten up those areas.
Highlight Key Features
Every home has unique selling points. Identify the most attractive features of your property and make them the star of your listing photos. Whether it's a cozy fireplace, a stunning view, or architectural details, accentuate these features to capture the attention of potential buyers.
Curb Appeal Counts
First impressions matter, and your home's exterior is the first thing potential buyers will see. Enhance your curb appeal by mowing the lawn, trimming hedges, and cleaning up any debris. Add a pop of color with potted plants or flowers near the entrance to create an inviting atmosphere.
Pay Attention to Details
Small details can make a big difference in your listing photos. Ensure all light fixtures are clean and in working order. Replace burnt-out bulbs and consider using soft, warm lighting to create a cozy ambiance. Fix any visible imperfections like chipped paint or cracked tiles, as they can be distracting in photos.
Consider Professional Photography
While smartphones can capture decent photos, hiring a professional real estate photographer can take your listing images to the next level. Photographers have the expertise to showcase your home's best features and create visually stunning images that will grab the attention of potential buyers.
Preparing your home for listing photos is a crucial step in attracting buyers and ensuring a successful sale. By following these tips, you'll be well on your way to capturing picture-perfect moments that showcase the true beauty of your property. Remember, the investment in time and effort to prepare for listing photos can significantly impact the number of inquiries and the overall impression your home makes on potential buyers.
5 Gifts To Leave For Your Old Home's New Owners
Selling a home is an emotional event. You are leaving behind a house filled with memories and venturing off to someplace new. The people buying your home are excited to create their own memories in a home that you loved for so many years. Welcome them with a thoughtful gift that will leave a lasting impression.
Here are some ideas for gifts to leave for your home’s new owners.
1. Personalized Key Rings
Mark this milestone in the new owners’ lives by giving them a special key ring. Engrave it with their initials, the date of the move, or even a special message from you. Not only is this thoughtful, but it’s a practical gift as well.
2. Mailing labels and stationery
Personalized gifts go a long way. Create mailing labels with the owners’ names and new addresses; if you want to go the extra mile, create personalized stationery for them as well. Leave these paper gifts on the kitchen counter with a nice note to surprise the owners.
3. Monogrammed Doormat
Doormats are something that may not be at the top of a new homeowner “to-buy” list. Give them a monogrammed one or one that fits well with the decor of the home. They will surely appreciate this gesture.
4. Practical Items
If you’re skeptical about buying personalized gifts, stick to practical home items. Things like smoke and carbon monoxide alarms, unpacking supplies, or even a utensil organizer are useful to new homeowners. They’ll be so busy when they first move in, and these are essentials that they should have immediately.
5. A Neighborhood Guide
Write a detailed list of your favorite places in the neighborhood. Mention your favorite restaurants, boutiques, gyms and more. They’ll love having your recommendations on hand when they start to explore!
All of these gestures are incredibly kind and memorable. It’s a nice way to welcome new people into the home and neighborhood you have loved for so long.
8 Things To Do Before You Move In
How exciting! The home has been purchased; inspection is done, and the closing date is set. Now what? It can be overwhelming to think about the packing and moving, especially when there are some things to consider at the new home.
Here is a list of 8 items to take care of before moving to make it a little easier.
1. Turn on your utilities
In order to make any repairs, clean, or really do anything in the new home before you move in, utilities need to be turned on. While you may not need cable TV or internet, you’ll want to at least make sure you have water, electricity, and gas working.
2. Take care of any necessary repairs from the inspection
Your inspector may have found some items worth taking care of right away during the home inspection and depending on what the agreement is, you may need to fix them after closing on the house. Prior to moving in, try and fix as many of the big-ticket items as possible. This will be one less thing to deal with after you move in. This is especially true if the repairs have anything to do with plumbing, electrical, or roofing.
3. Deep clean the entire house
The sellers may have hired cleaners or attempted to clean the home themselves, but it is always best to deep clean the house. Some people may opt to do this themselves, but there’s nothing wrong with hiring a professional cleaning service. This will ultimately save a lot of time. Some areas of the home to pay close attention to are cabinets and closets, flooring, appliances, and bathrooms. Make sure that the floors inside of closets are thoroughly cleaned and that any shelving in closets, pantries, or cabinets is wiped down. When it comes to flooring, you’ll want to hire a professional carpet cleaning service and evaluate hardwood, laminate, or tile flooring to see if it needs any extra TLC. In addition to that, consider changing the toilet seats.
4. Add any additional storage, shelving, or built-in features you want
If you purchased the home knowing that you were going to want additional shelving, cabinets, or storage, it’s best to get all of these items added and built out before you move in. This means that when you do move, you’ll be able to put away all of your things instead of leaving boxes to get unpacked after your new shelves are complete. It’s much easier to have this type of construction handled before you move in and have to worry about convenient scheduling and potentially moving your personal belongings.
This particular point is also true for new home buyers. If you purchased a new home build but knew that there were custom design options the builder would not include, the best time to add them is before you move into your new home. This is also true of any flooring changes.
5. Complete all interior paint if necessary
If you are planning on changing or even just touching up the existing paint in your new home, it’s best to get this done prior to moving in all your furniture and possessions. It will make the process significantly easier for both you and the painters if they do not need to worry about moving and covering furniture. Make sure you do this after any additional construction, but before you put in new flooring or have the existing flooring cleaned.
6. Call in the exterminator
If you’re already aware of some type of pest problem it’s an especially good idea to call these guys before you move in, but even if you’re not, it’s never a bad idea to have pest control come out and spray your yard and home. If you have pets, it will be significantly easier to have them come before you move in, plus it gives their extermination methods a little time to start working before you move in.
7. Reset your garage door code
More than likely the previous owners of the house gave you all the garage door openers, but in my opinion, it never hurts to reset the code just to be extra sure that no unwanted visitors will be coming in through the garage.
This is also a good idea for new home build owners. Even if you’re putting a brand-new garage door opener in your garage, make sure to reset or change the code. Often the codes are not changed after the opener is installed and having the manufacturer default code is never the best security practice.
Finally (and probably the most important step):
8. Change your locks and keys
This is probably one of the most important things to do before you move into your new house, and it should be taken care of last on this list. During the home selling process, keys are given to many different people like handymen, inspectors, and real estate agents to name a few, and in addition, homeowners typically provide backup keys to either close friends and family or even neighbors or house sitters. So even though you were provided “all” copies of your new keys at closing, you never know who might still have an extra copy. After you have finished all necessary repairs, cleaning, and construction, hire a locksmith to change your locks to ensure that only you have a copy of your new house keys.
Simple Ways to Refresh Your Space
It’s easy to get sick of your home decor, especially if you have been staying home a lot. There’s no need to do a complete makeover of your home, just switch up a few things. You’ll be surprised how a few simple changes can give you a whole new outlook!
Take Advantage of Natural Light
Open those blinds and bask in the natural light. Instead of flipping on your lights in the morning, pull back the curtains and let sunshine fill your home. The simple act of opening your windows can help lift your mood, and you’ll save a little on your electric bill too.
You can also take advantage of the natural light to add in some more houseplants or help your current ones thrive! By simply adding in natural light, you have so many options to refresh and enjoy your living space.
Give Your Home a Good Clean
It seems simple but giving your space a deep cleaning and decluttering can instantly revitalize a room and make your home much more livable. Even if you only go this far, it will surely make a major difference in refreshing your home. Set goals to clean and declutter one space at a time, and then work to organize anything left behind. This is an easy and rewarding way to give your home a quick refresh!
Change Up Your Bedding
Making small updates to your bedroom, like changing up your bedding can change the whole look of your room and give it a fresh feel. This is the perfect time of year to wake up your bedroom with some new bedding. Or simply refresh your look by switching out your heavy winter blankets, throws, and pillows with lighter-weight and lighter-toned versions. You could also add some throw pillows or a blanket at the end of your bed to add different textures and colors.
Rearrange Your Furniture
Rearranging your furniture is an easy and free way to completely transform your space. Try changing up things or even losing pieces that just don’t fit. You’d be surprised how doing this can make your space seem more open and change the whole look of the room, while also becoming more functional. Plus, it’s kind of fun to shake things up a bit and change your furniture layout.
If you are feeling bored with your space, you don’t have to completely remodel your home to switch things up! By swapping out a few pieces, adding in some new decor, or even letting more light in, you can achieve the looks you want. These are all cheap and easy alternatives that will have a major impact on your living space!
Eliminate Pet Odors In Your Home
Eliminating bad odors from your home is incredibly important, and you want to make sure you've removed them before putting it on the market. Often times, the first thing buyers notice upon entering your home is how it smells. If there is an odd odor, it will instantly put them off.
No matter how beautifully staged and presented it is, strong odors or stale air can make your home unappealing to prospective buyers. Opening windows and exhaust fans will only go so far in removing foul odors, and generally won’t eliminate them completely. To ensure you don't lose potential buyers, follow these odor eliminating tips to ensure your home smells and feels fresh and new.
Don’t Use Artificial Freshening Sprays
Don't make the mistake of spraying artificial room freshener sprays in hopes that it will remove the bad odor. Deodorizers will quickly fade, and only mask the smell, sometimes in an overwhelming way. If a buyer walks into your home, your air freshener can cause a reaction, like a runny nose or a headache, and will make them suspicious of an underlying foul odor. Instead of trying to mask it, locate the actual source of the bad odor and get rid of it.
Best Pet Carpet Cleaners for Accidents
We all love our furry friends, but unfortunately, they can get your home pretty smelly. Whether the smell is on the carpet, furniture, or even on the walls - it's essential to have it removed. Most odors stem from accidents. You always want to attend to the accident right away. Blot them with a paper towel and use mild dishwashing liquid to help remove the odor. Once completely cleaned, blot again with fresh paper towels to dry the spot. If the accident is not recent, use an enzyme cleaner to eat the bad bacteria. Another great idea is to use activated charcoal. It is a form of carbon that has been activated to make it extremely porous. You can get activated charcoal meant for pet odors at most pet stores.
Green Cleaning Products
Using natural odor eliminators is a great green alternative to most of the chemicals sold at stores. One of the most recommended products is baking soda. You can place an open box of it in a room to help absorb unwanted smells. It also helps to remove musty aroma in dark spaces, like a basement. On top of being used to remove pet odors, it also works great for cigarette smells. If you don't wish to use baking soda, most pet supply stores will have green cleaning products that help remove odors, while still being safe for your household.
How to Make Exterior Painting A Breeze
Nothing can make your home feel as fresh and new as an exterior paint job. Here are the steps to take to make painting the outside of your home a little easier.
TAKE A DAY TO WASH THE EXTERIOR OF YOUR HOME
Keeping your home looking great on the outside starts with a yearly cleaning. If you aren’t already cleaning your exterior once a year, this is a great time to start. The easiest way to do so is with a pressure washer. If you don’t own a pressure washer, you can rent one. You will also need protective eyewear, cleaning solution made for pressure washers, and a stiff brush. You’ll want to soak the entire surface to get rid of any loose debris, and then you’ll use large sweeping motions to clean each wall from bottom to top. Start at least 10 feet from the exterior walls to prevent causing any damage, and use low settings when cleaning doors and windows.
USE A WEEKEND TO MAKE ANY NEEDED REPAIRS
After making sure the exterior is clean, you’ll want to take a weekend to make any repairs needed before painting. You will want to sand, fill and weatherproof the surfaces on the first day and use the next day to prime any stains. Things to add to your to-do list include:
-Replacing any rotted trim or siding
-Sanding protruding burrs or paint drips
-Patching and filling holes with the appropriate filler
-Replacing old caulk
SET ASIDE A MONTH TO PAINT YOUR HOME’S EXTERIOR
During the first week, you will want to upgrade the front door casing if needed. Once that is completed, you can use your second week to begin painting. You will want to use a roller brush for the large areas and an angled brush for any edges. Always work from top to bottom to prevent paint drippings. Save trim painting for the end! For your third week, you will need to sand out any paint drips or small issues and paint your second coat. Use the last week of the month to add any changes needed. If you want to change your front door color or any fixtures, wrap up the month by doing so!
10 Items You Shouldn't Store in Your Pantry
Not all foods store well in the pantry, even if it says it doesn’t require refrigeration. Some can go stale, others grow bacteria, and a few develop mold. Here are 10 items that are better off stored in your fridge.
Garlic-Infused Olive Oil
Homemade garlic-infused olive oil can contain botulinum spores, which grow into the bacteria that cause botulism. Any oil infused with garlic should be kept in the refrigerator to prevent bacteria growth. Throw it away after seven days.
Pure Maple Syrup
Pure maple syrup can go moldy, so it’s best stored in the fridge. If you store your syrup in the pantry and the container is opaque, you may not see the mold until you’ve started to pour syrup on your pancakes.
Sunflower and Truffle Oil
Cold-pressed oils like sunflower and truffle oil have a short shelf life if they’re not refrigerated. As they’re pricier than some of their counterparts, it’s definitely worth keeping them cold to extend their usefulness.
Nuts
When stored in the pantry, nuts are more likely to go stale. If you frequently reach for the nuts, you may be leaving bacteria behind, and if you grab a few nuts while your hands are wet, the chance that bacteria will grow increases. Over time, you could end up with nuts that are both stale and covered in bacteria.
Salami and Other Cured Meats
Cured meats are prone to drying out if opened and stored in the pantry. Wrap the meat in butcher paper and refrigerate it to preserve its flavor and texture, and to protect you from potential illness.
Chocolate
You can extend the life of chocolate by storing it in the refrigerator. Before you stick it in the fridge, wrap chocolate tightly. Once the chocolate is wrapped, put it in an airtight container until you’re ready to eat it.
Tortillas
Though tortillas are rarely served cold, it’s best to store them in the fridge. Whether you use flour or corn tortillas, they’ll stay fresher longer if kept at a regulated cold temperature after you open the package.
Whole-Grain Flours
Whole-grain flours retain the bran and germ that gets removed from all-purpose flours. Both bran and germ contain oils that can go rancid if they’re not refrigerated or frozen, so keep your all-purpose flour in the pantry, but move the whole-grain to the fridge.
Natural Peanut Butter
Natural peanut butter, the kind that separates in the jar, needs to be kept cool. Like the oils in whole-grain flours, the oils in natural peanut butter can go rancid if left in the pantry.
Mustard
Most mustard containers indicate that refrigeration isn’t necessary after opening. But mustard loses its flavor and vibrant color fairly quickly. To keep it tasting and looking its best, keep mustard in the refrigerator.
Turn An Old Candle Into New Decor
Have you been collecting old candle jars with the intentions of doing something with them? Or do you have a few sitting around your house that you just haven’t tossed yet? Reusing and recycling is not only ‘in’ right now, but it is eco-friendly! Instead of tossing those jars in the trash, consider ‘recycling’ them yourself.
Here are the 5 steps to turn an old candle into a decorative jar that you can use in any room of your home!
What you’ll need:
-Chalk paint
-Sandpaper
-Superglue
-Small decorative knob (design of your choice)
-Clear wax
-Paintbrushes
Step 1: Remove any remaining candle wax
There are several ways to do this, but the easiest and safest way is placing your jar into the freezer for a few hours. Wax hardens and shrinks when frozen, so you will be able to pop the remaining wax out with a butter knife. Scrape any remaining residue off and clean out the jar with soap and warm water.
Step 2: Paint the lid with chalk paint
If you have a color scheme in your home, choose a chalk paint that will accent the room you plan to use your jar in. White is always a safe choice if you are unsure! Be sure to grab a small piece of sandpaper to use between coats if you don’t already have some on hand. This will help to create a smooth finish on the lid.
Step 3: Cover the lid with clear wax
After your chalk paint is sanded and wiped down, cover the lid with clear wax. This will add the perfect finishing gloss to the lid.
Step 4: Attach your knob
Using superglue, attach the knob to the center of your lid. Let the glue dry and set completely.
Step 5: Fill with goodies and display
Whether you’re using it for cottonballs in your bathroom or candy on your office desk, your new jar is ready to show off!
Home Bar Essentials
If you love to entertain when you have guests over, you may be working on building your home bar. While enjoying time inside doesn’t require a bar, sometimes a happy medium between a full-on wet bar and just a few beverages in the fridge can help elevate the hosting experience.
Here are the essentials you need for a great home bar:
1. Bar Fridge
Having a separate bar fridge is a great addition for several reasons. First, you can keep your beverages at the temperature they are meant to be kept at. Beverage refrigerators are best kept 10 degrees warmer than the normal fridge temperature. Another great reason is that you will no longer waste fridge space for beverages. Now, you don’t have to worry about taking food out to put drinks in!
2. Bar Decor
Decide what style you want for your bar space. Whether you want an elegant or pub theme, choose pieces that will tell a story.
3. Plenty of Glassware
When hosting guests at your home bar, it is helpful to have a variety of glassware to suit the types of drinks you may be making. Keep rocks glasses, highball tumblers, and stem glasses - with a few red and white wine glasses on hand. Pint and shot glasses are also great to keep in your bar.
4. Cocktail Shaker & Strainer
If you have a cobbler shaker, there is no need for a strainer, as they are usually built in. If you have a Boston shaker, which can be a little trickier to use, you will need to get a strainer for pouring your drinks.
5. Ice Trays
Unless you have an ice machine, you will need to have ice cube trays. Silicone trays are much easier to get cubes out of and tend to be much sleeker in appearance. Try to find trays with larger compartments so your ice will last longer.
6. Bar Accessories & Tools
Some items you may want to have in your bar for some cocktails include:
Mixing Spoon
Muddler
Jigger
Measuring Shot Glass
Should You Try Peel-and-Stick Wallpaper?
When you think of wallpaper, you likely picture rolls of material that are plastered or glued in place. Once the wallpaper is up on the walls, that’s pretty much it; while wallpaper can be removed, the process usually isn’t very quick or easy. If you want the look of wallpaper without the hassle, however, there is another option: peel and stick wallpaper. If you weren’t aware that this was available, it might be worth looking into.
What Is Peel and Stick Wallpaper?
Similar to some other wall decorations, peel and stick wallpaper is a vinyl applicant that has its own adhesive on one side. A protective paper backing covers the adhesive and is peeled off before application, allowing it to be placed without the need for glue or other messy adhesives. The adhesive on the back of peel and stick wallpaper is strong enough to hold the wallpaper in place, but not so strong that it can’t be removed with ease; when you’re ready to take it down you can simply peel it off without having to worry about the wallpaper tearing or causing any sort of damage to the wall surface beneath it.
Peel, Stick and Adjust
As with more traditional wallpaper options, peel and stick wallpapers typically feature repeating designs that are essentially seamless once everything has been installed. The self-adhesive nature of the wallpaper makes it easy to start a wallpaper installation since you can position the first piece more easily than you might with wallpapers that have separate adhesives.
There is another advantage to using this self-stick adhesive as well. Because it’s designed to release easily, you can adjust the positioning of the wallpaper with ease during the installation process. This helps to ensure that none of the wallpaper is crooked or out of alignment, since you can correct any problems as they occur without having to reapply adhesive or worry about damaging the paper.
Residue-Free Removal
One big advantage that peel and stick wallpaper has over more traditional wall coverings is that you can remove it and replace it whenever you need to. The vinyl material that peel and stick wallpaper is made from is harder than paper, so not only is it less likely to be damaged in day-to-day life but it’s also much less likely to tear during removal. The adhesive on the wallpaper leaves no residue behind and isn’t going to peel off paint or other surface details. While peel and stick wallpaper typically isn’t designed for reuse after removal, you can remove one peel and stick design and replace it with a different design, or even more traditional wallpaper, without any issue.
Multiple Surface Options
Peel and stick wallpaper goes well on walls, but it can also be applied to other surfaces as well. The main requirement for application is a clean, dry surface without texture. Your walls should be painted with at least a base coat, but the paint shouldn’t have any texturing agents added. Surfaces with non-stick elements added (such as non-stick paint) or residues need to be cleaned or painted before application as well. Peel and stick wallpaper can be added to drywall, wood or any other surface that either meets its requirements or can be painted to provide the clean, smooth surface that the wallpaper needs for adhesion.
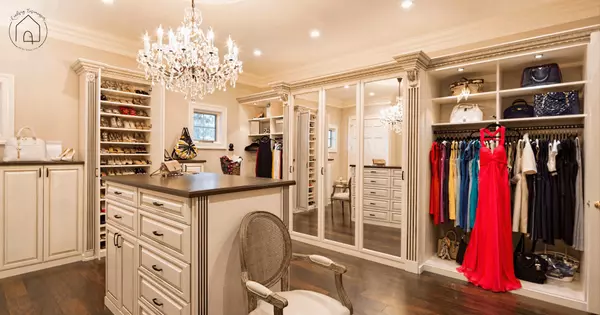
Make That Small Closet Look Bigger
If there is one thing that can turn a potential client away from a home they may be on the fence about, it is a tiny master closet. When a potential buyer falls in love with your large bedroom only to find that the closet is a fraction of the size they expected it to be, it could make them want to keep looking at other houses on the market. While that may not be the case for everyone, there are plenty of women (and men) who enjoy having a nice closet space. While you may not be able to expand the square footage, here are some steps you can take to make that small closet look bigger and more appealing to potential buyers!
1. Marie Kondo your closet
The KonMari method is all the rage today so many people are cleaning out their closets - and the rest of their homes - in an attempt to live a little more like a minimalist. With this movement being so popular, many people searching for new homes might be even more aware of clutter, especially in small spaces. Declutter your closet and donate anything that doesn’t “spark joy.”
2. Add some paint and light
Even large closets can look small if they are have dark walls and not much light. Since most closets don’t have windows, consider adding a light fixture to brighten the space and a mirror to multiply the amount of light bouncing throughout the closet. By painting the walls a nice bright white or off-white, the room will expand and look inviting.
3. Organization is key
Once you’ve removed the clutter, you may still have a lot of items that you aren’t willing to let go of. By adding shelving or even a closet organizational system, you can fit more into your closet without taking up as much space. If you want to stay on budget, try a DIY closet system that is easily installed and can be purchased at your local home improvement store!
4. Show off your favorite items
While decluttering is key, displaying the things you love on nice hangers or placing those handbags/shoes you adore on your newly installed shelving can help potential buyers picture their own favorite items in your closet. Keep it neat and organized, but show off the things you love most!
These tips will help you ensure that your closet space doesn’t prevent you from selling your home. Remember, if you are ready for a home with a bigger closet, call me and we will find you the walk-in of your dreams!
Lindsay Eisiminger
Phone:+1(720) 934-0343